
Tessellated Menagerie (12 months of aRt, January)
January 31, 2019
Motivation
Welcome to the inaugural post of my 12 months of aRt project! In these posts I’ll walk through my motivations, technical aspects, and design choices for various generative/data art projects I make using R. Read more about my reasons and expectations for this project in my intro post.
I’ve always loved the aesthetics of low-poly animal sketches, so I set out to see if I could recreate this in R. The original idea was to make an image triangulator to take an image and turn it into a series of triangles that would recapitulate the original image. But like most things, it morphed into something completely different along the way.
Triangulation
I started out trying to calculate the Delaunay triangulation of an image. This excellent post from Fronkonstin (an amazing math art R blog) did most of the work for me. Here we take an image, convert it to greyscale, then sample points based on the darkness of each pixel. Using these points we calculate the delaunay triangulation using the deldir package (Fronkonstin calculated the voronoi tessellation, which is the dual graph of the Delaunay triangulation—more on that later). My image of choice was a black and white silhouette of a giraffe, because I think giraffes are cute. The pixel sampling relies on high-contrast so a perfect silhouette is the ideal example to start with… little did I know this would influence my final outcome quite a bit. The first thing I got working looked like this.
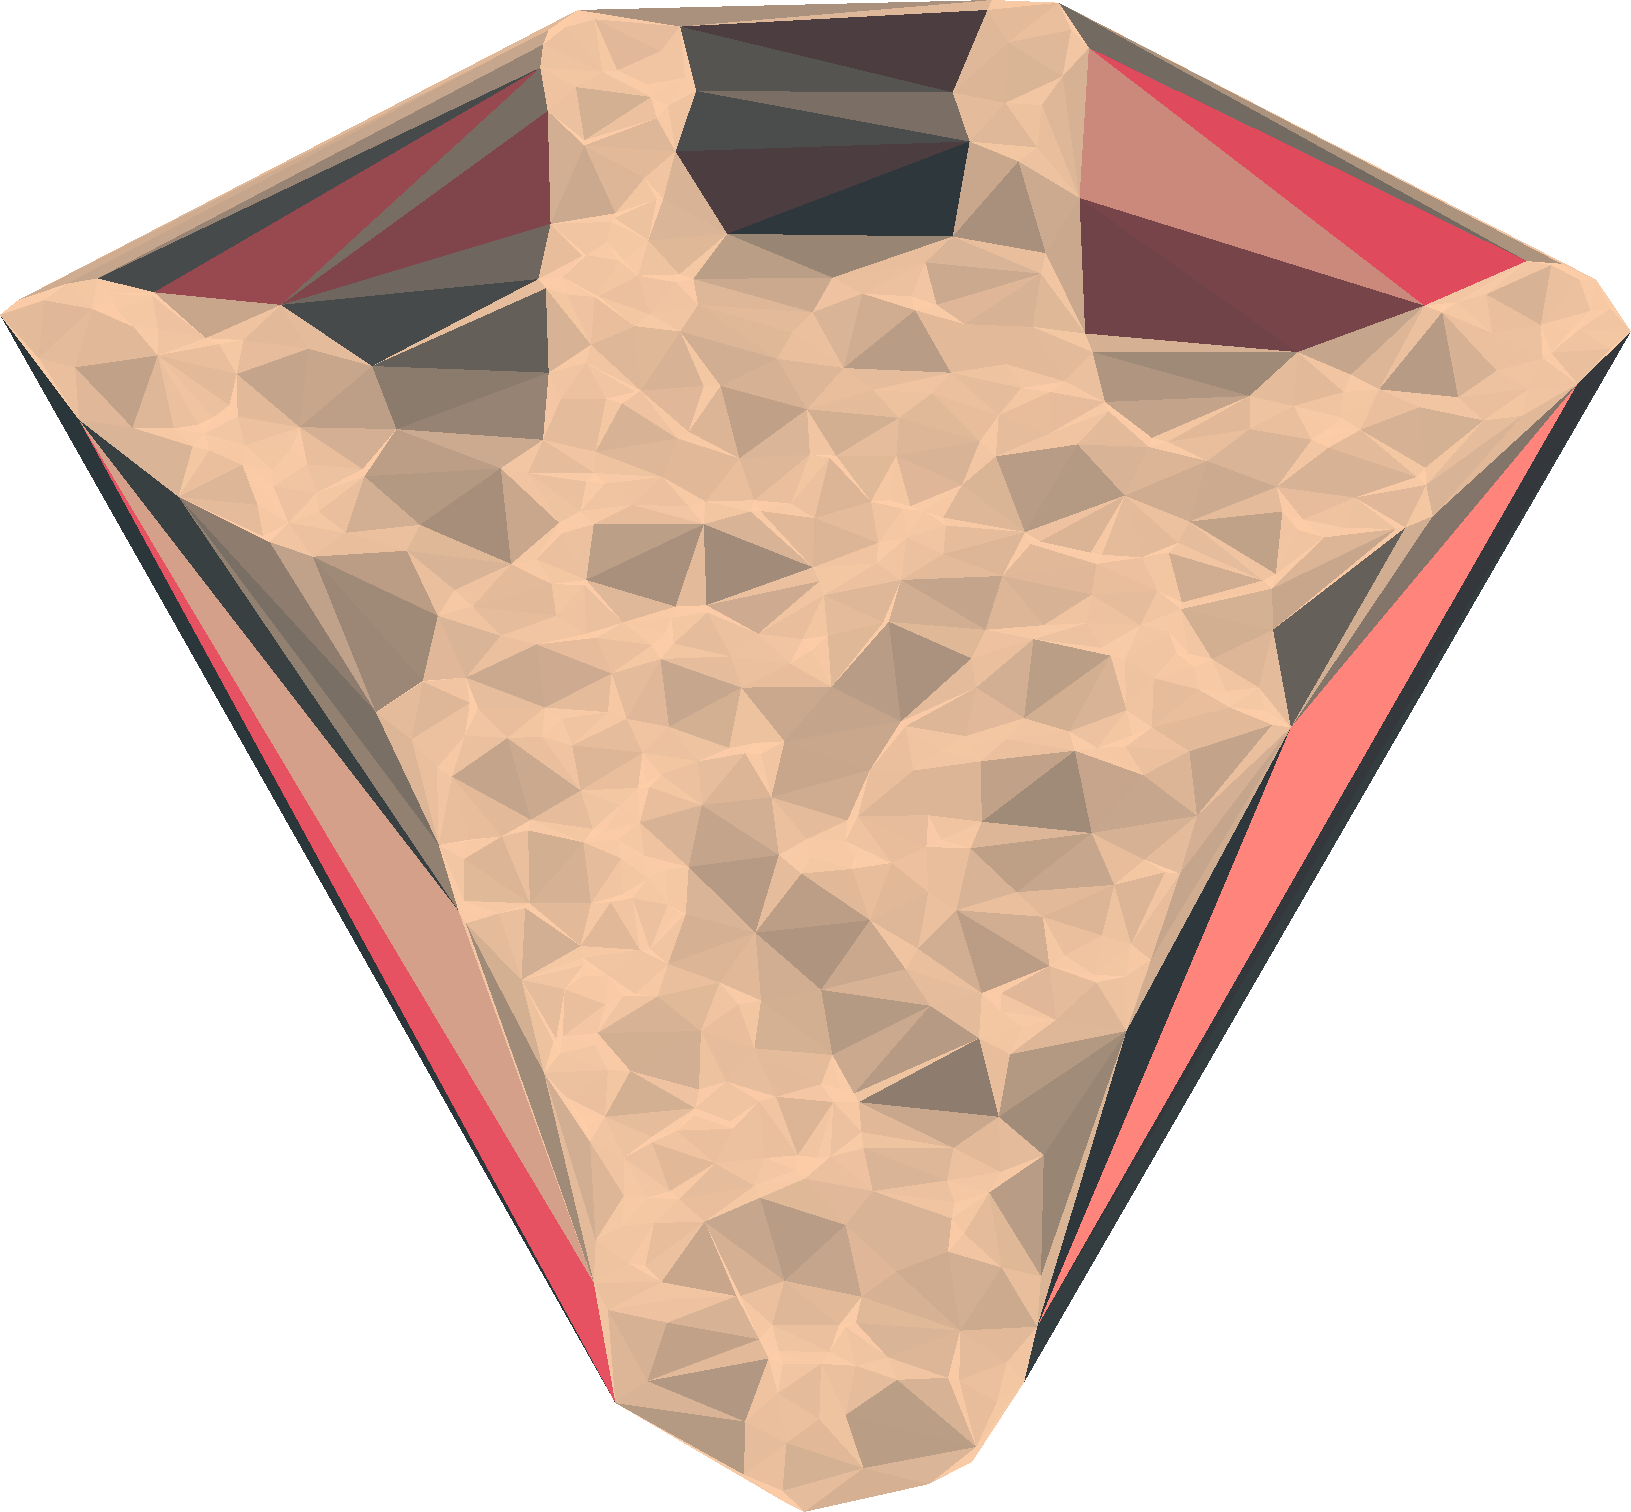
Technically this is what I asked R to do, but it’s not what I wanted it to do. What I really want is a constrained Delaunay triangulation, which as it turns out, is much harder to do. The RTriangle package can do constrained triangulation, but you need to specify a set of ordered edge points. Getting the outline of my giraffe was easy using imager::cannyedges, but this doesn’t put them in order. What we need to do is find the shortest path through the points while only visiting each point once—the classic traveling salesman problem. I actually coded up a solution to do this using the tsp package, but later realized the algorithm doesn’t work well when there are sharp corners and is generally unreliable. There was also not a great way to reduce the number of points to make a more triangular outline that still resembled the original silhouette. In the end this was a problem that’s super easy for a human, but surprisingly hard for a machine, so I decided to do it manually. I built a shiny app that lets me interactively click on the outline points to choose those I want to keep and put them in an ordered dataframe which I can copy and paste into R using datapasta.
Once I had my outline points, there’s some finagling to get them in the format that RTriangle wants, and then we need to generate some fill. The fill points will determine how big the triangles and how many triangles make up our final image, so it’s a very important step. Generating random points is an obvious place to start, but random points tend to make a bunch of clusters and voids, we want something more evenly spaced. On the other side we could try an evenly spaced grid, but this is just too perfect and regular—A classic goldilocks dilemma. There’s actually an algorithm to generate random, but evenly spaced points: poisson-disc sampling. Unfortunately, there’s no R package to do this*. A sort of ok solution is to generate a ton of random points and then remove them until none are within a certain distance to each other. I stole a stack-overflow response that does this; it works, it’s just slow.
So, outline and fill points in hand, we let RTriangle do its magic, then with a little sleight of hand we extract the polygon coordinates into a nice dataframe, and voila!
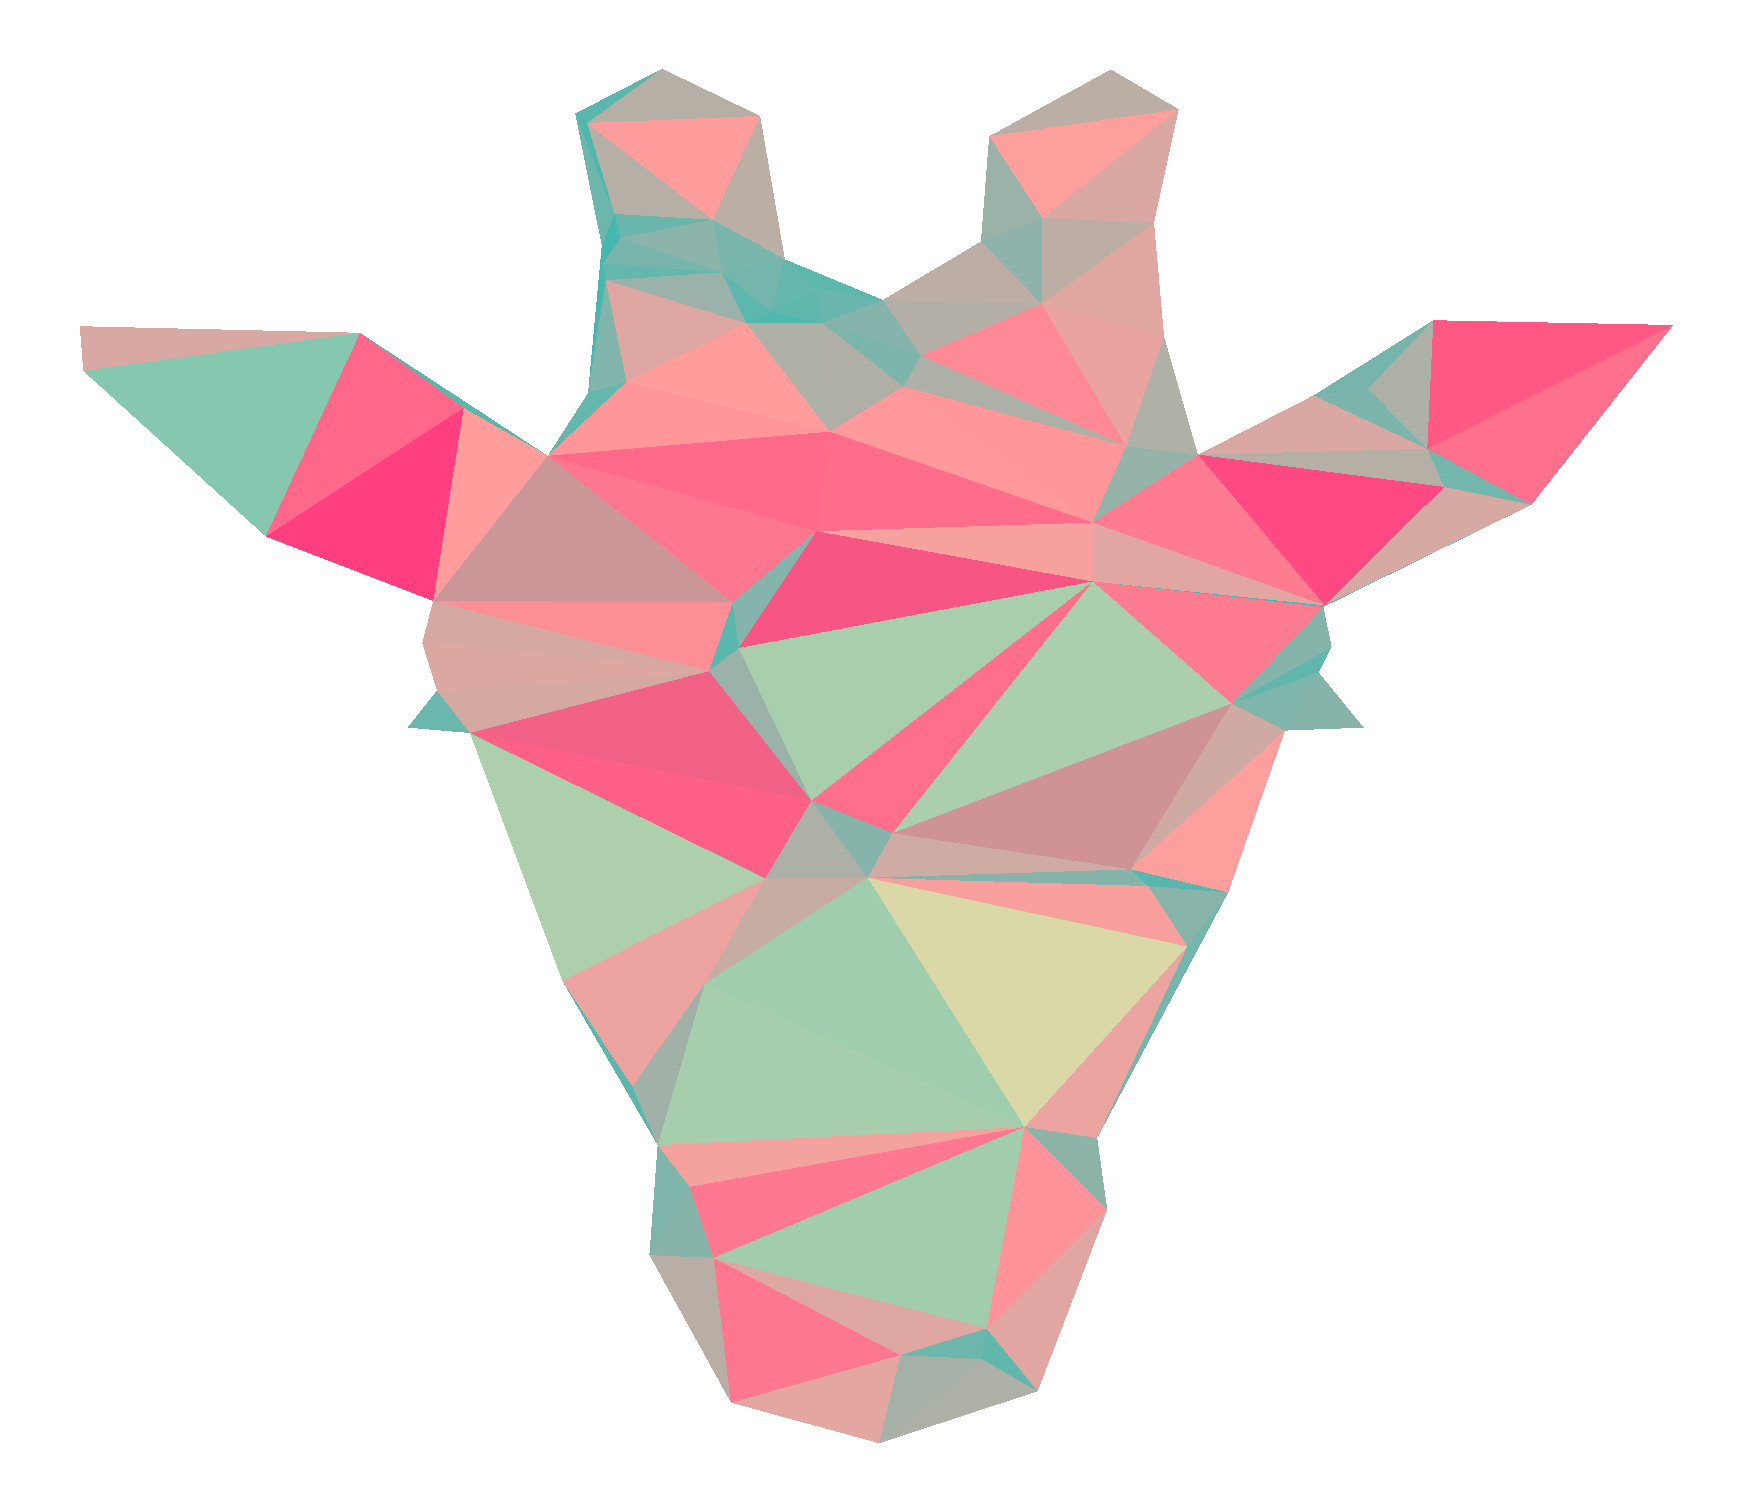
From here the choices are yours: more fill points = more regular triangles, change fill color, add outlines to triangles, you get the idea. Once I got here, I realized I really liked this more abstract version with wacky colors compared to a pure image triangulator that would try to make a low-poly but “real” looking animal—so I ran with it.
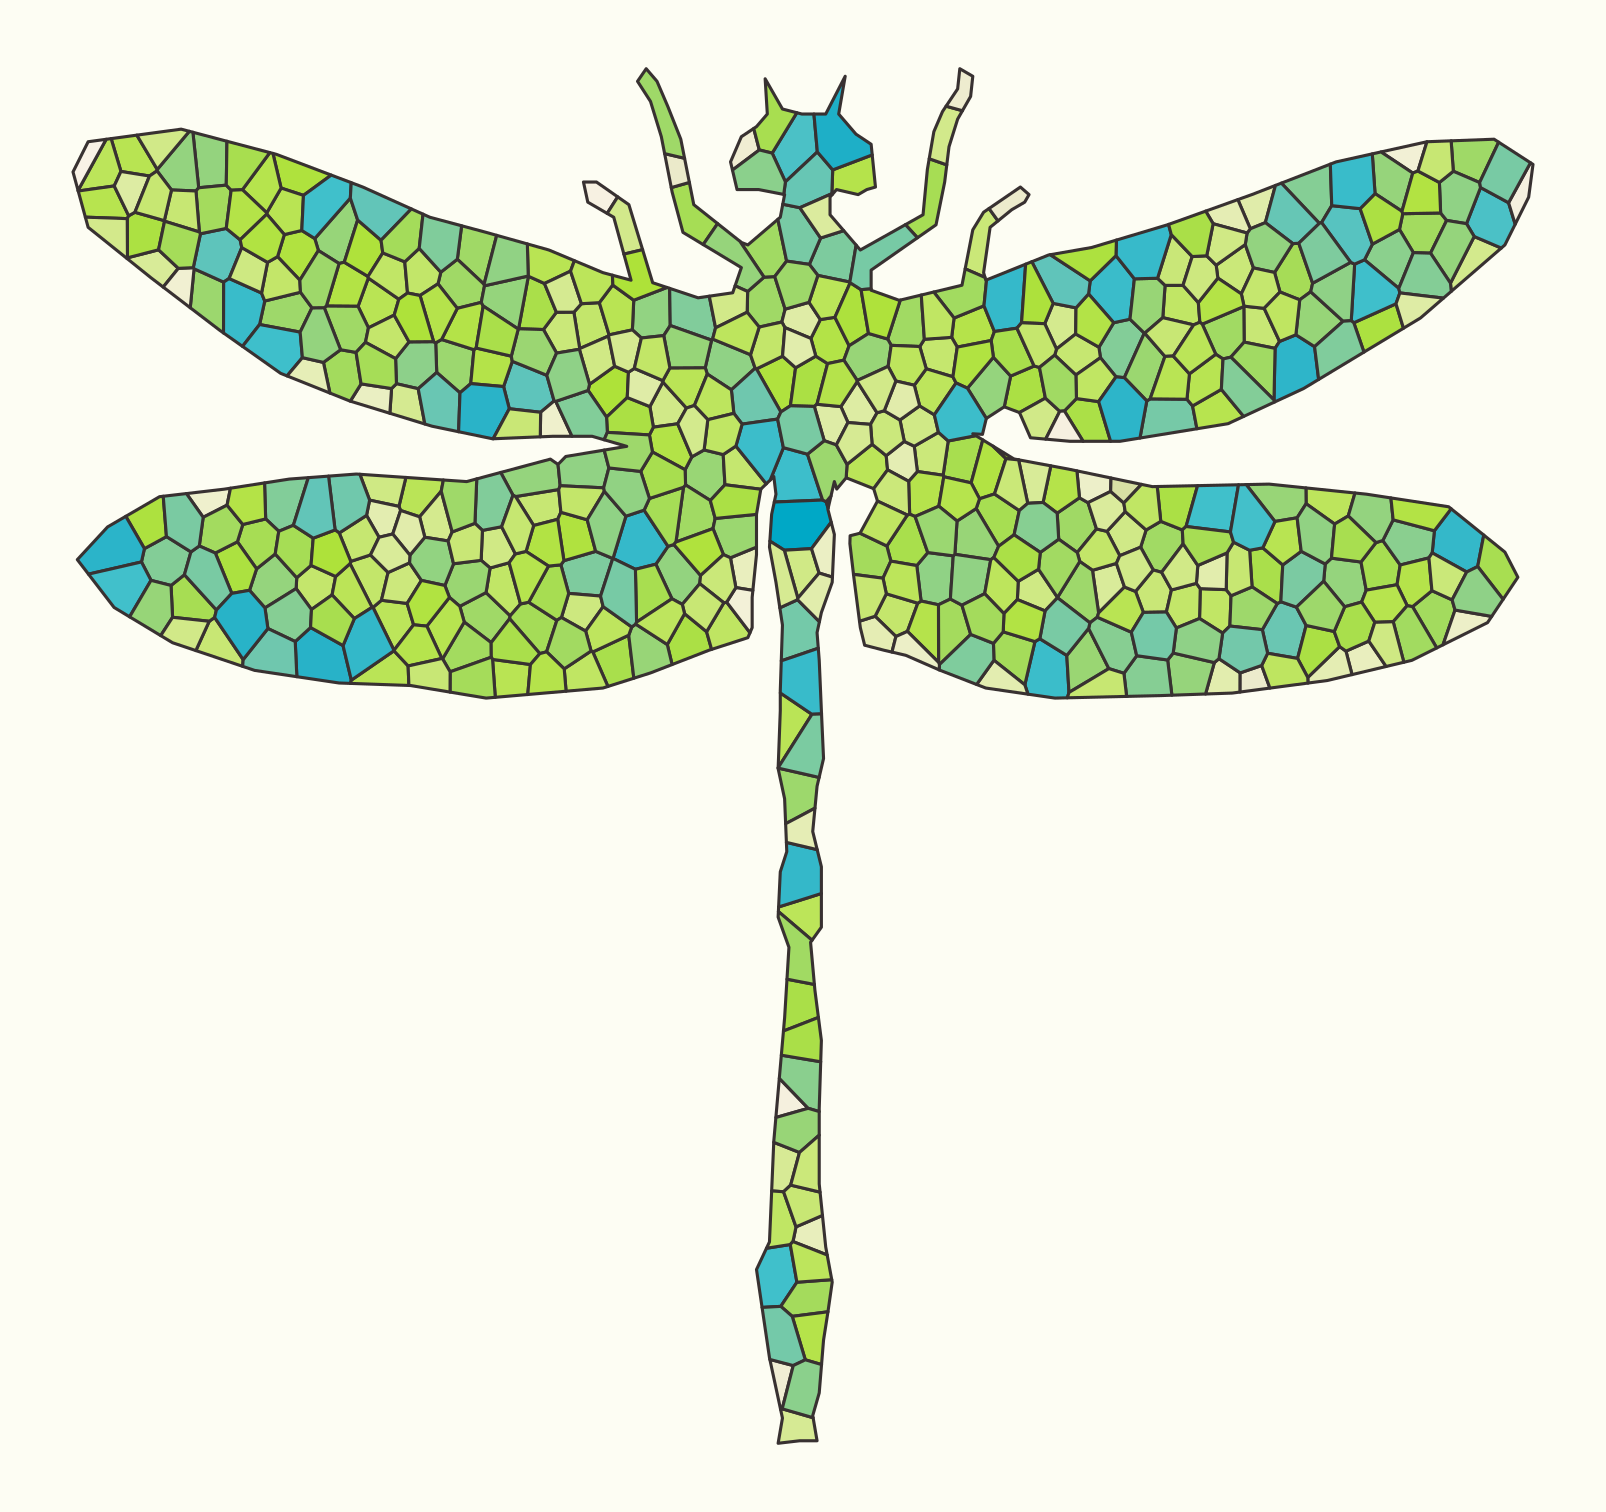
Voronoi tessellation
After nailing triangulation (I think I nailed it, right?), I thought: why stop there? All kinds of tessellations are possible with R. An obvious one is Voronoi tessellation. This was covered pretty well by the Fronkonstin post I mentioned earlier, but again I wanted a constrained version. There’re no built-in functions in R for doing constrained Voronoi tessellation, so we have to be creative. My solution was to get an outline and fill points using the same method as for triangulation. Next, I calculated the Voronoi tessellation for this set of points using the deldir package, and then calculated the intersection of the outline and the Voronoi polygons to basically clip off any regions outside of the border. This all involved some janky conversion between polygons and lines and SpatialPolygons, but it works, and I think it looks pretty cool.
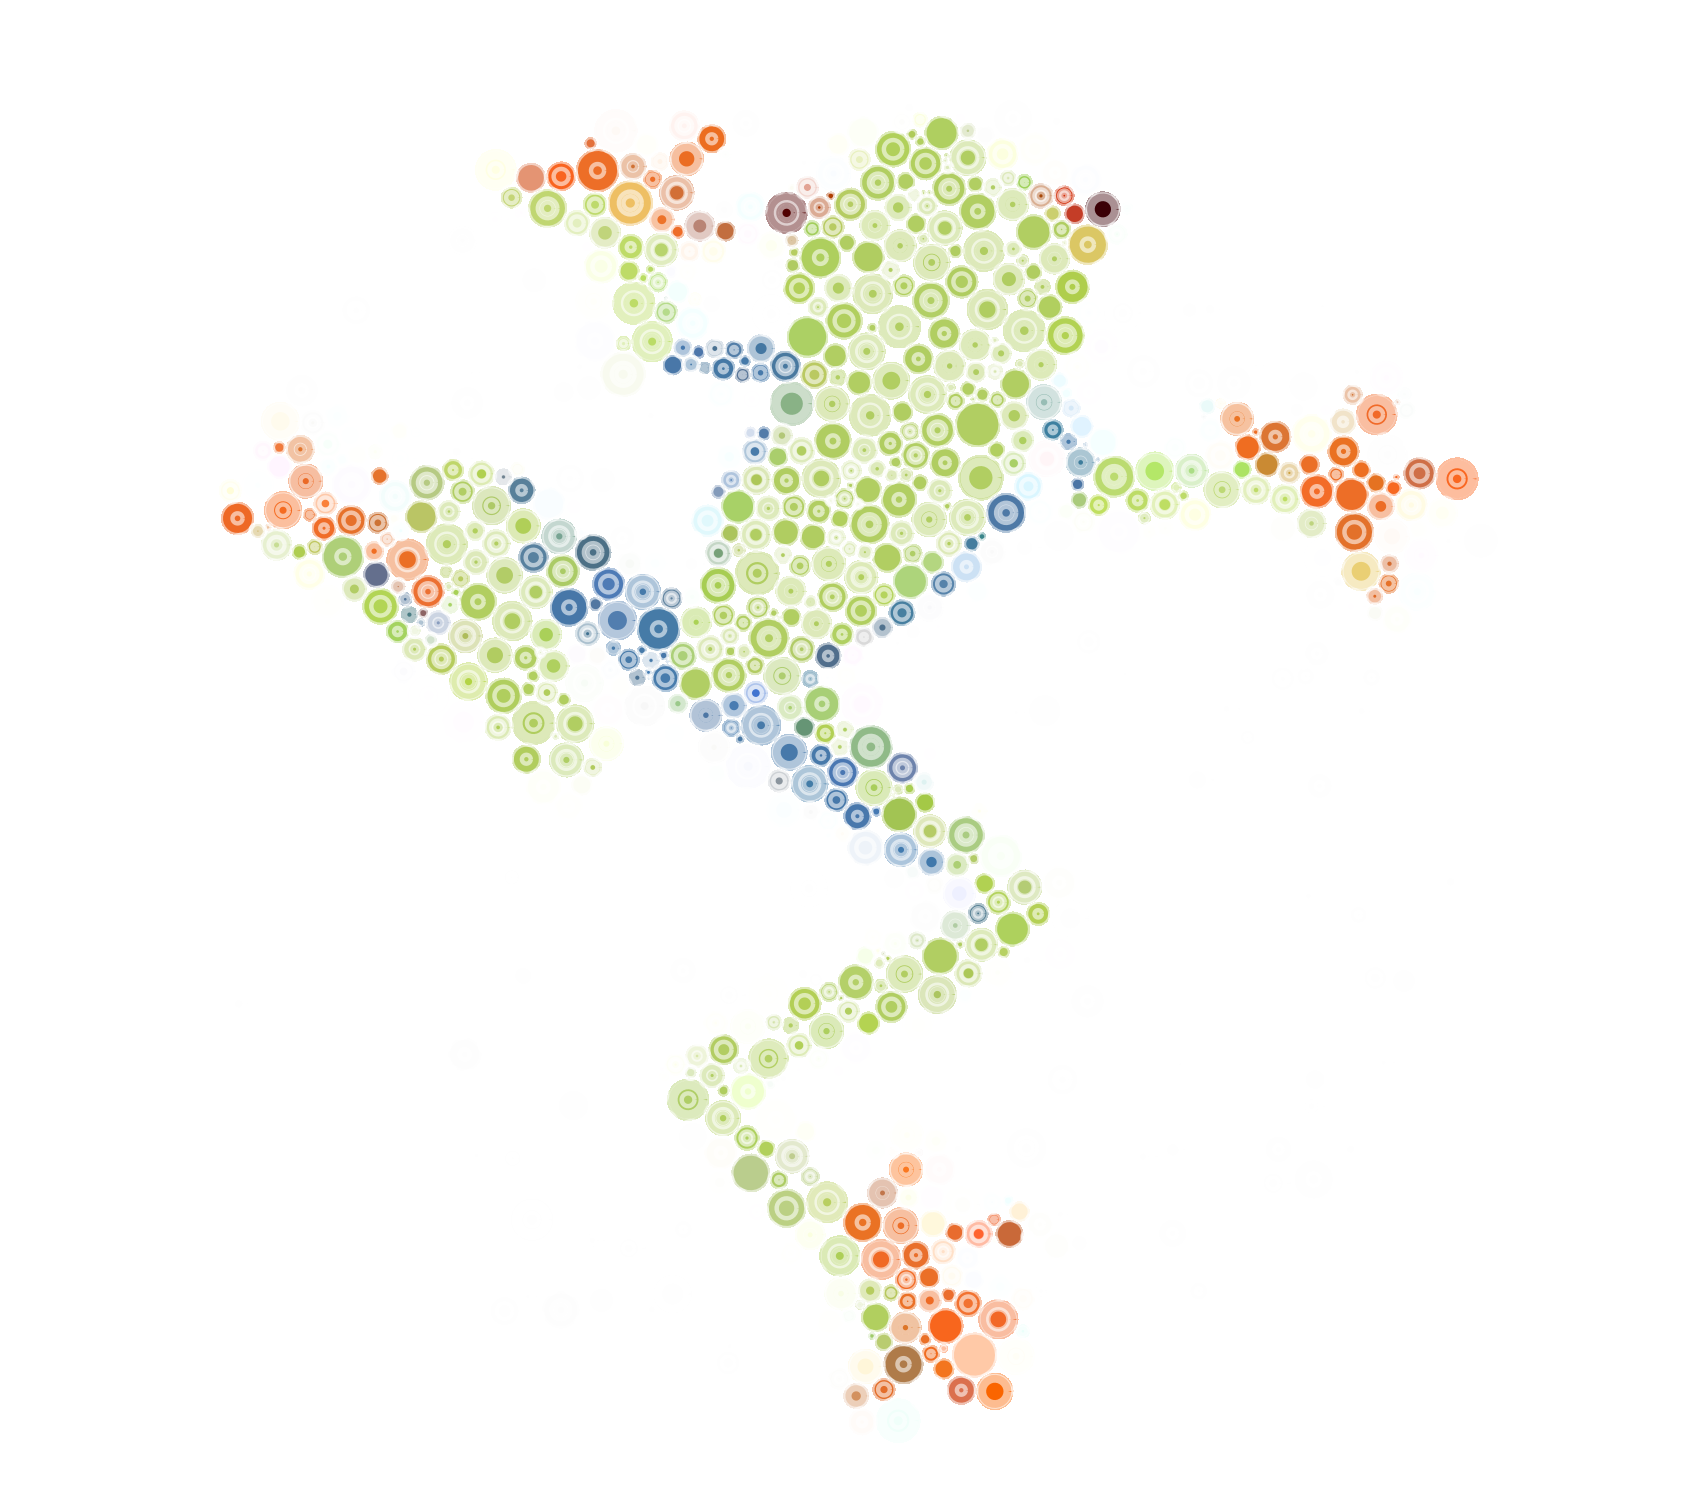
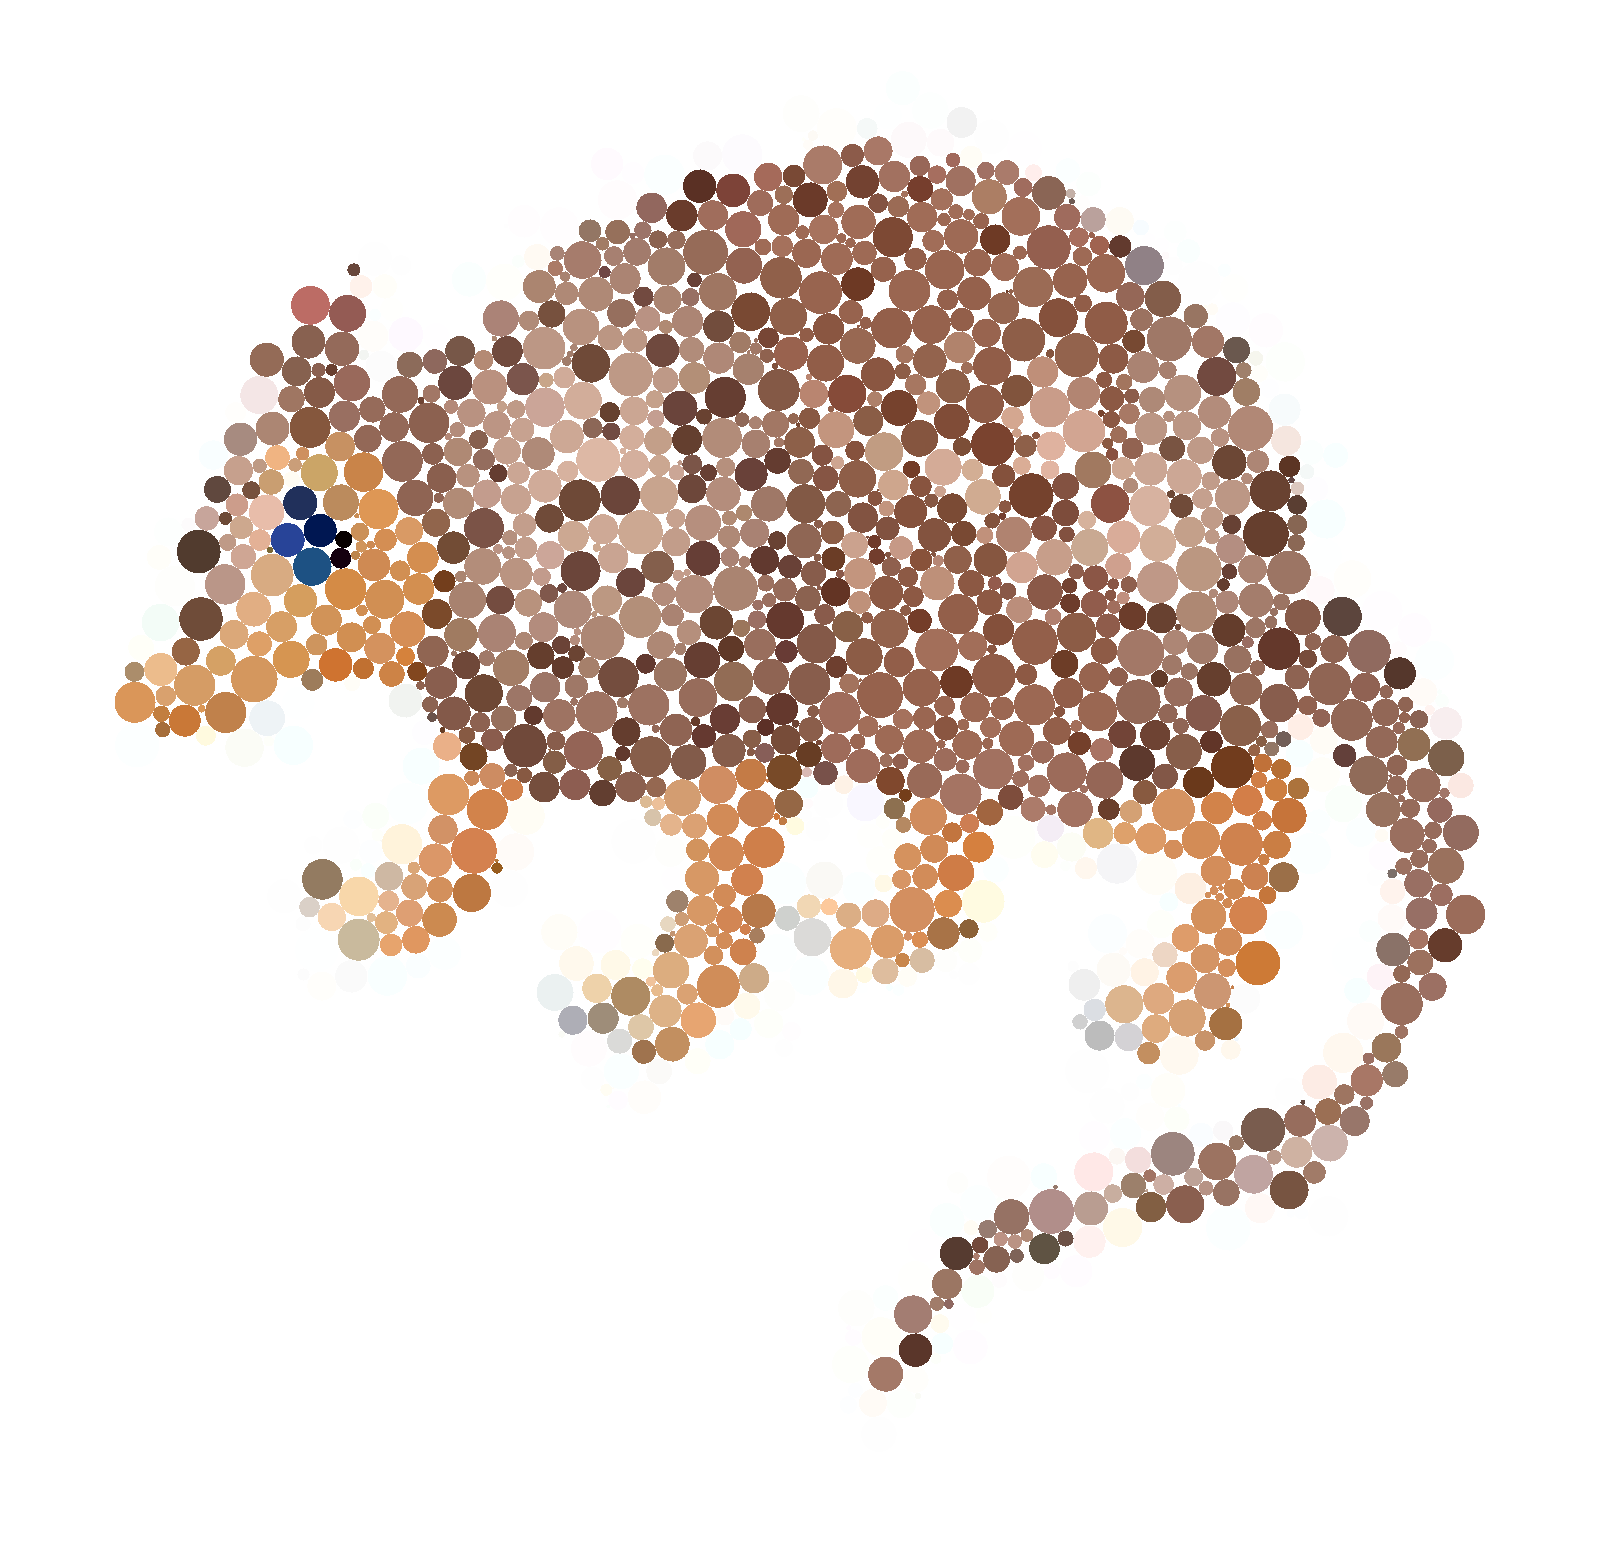
Circlepacking
Of course it was Mara Averick who alerted me to this awesome resource on circlepacking, and I immediately knew I had to try it on my tessellated animals. Lucky for me Chi’s code was amazing and well commented so it was a breeze to adapt it for my project. This is a great method for using more realistic images, since you can extract the colors to make a more recognizable figure.
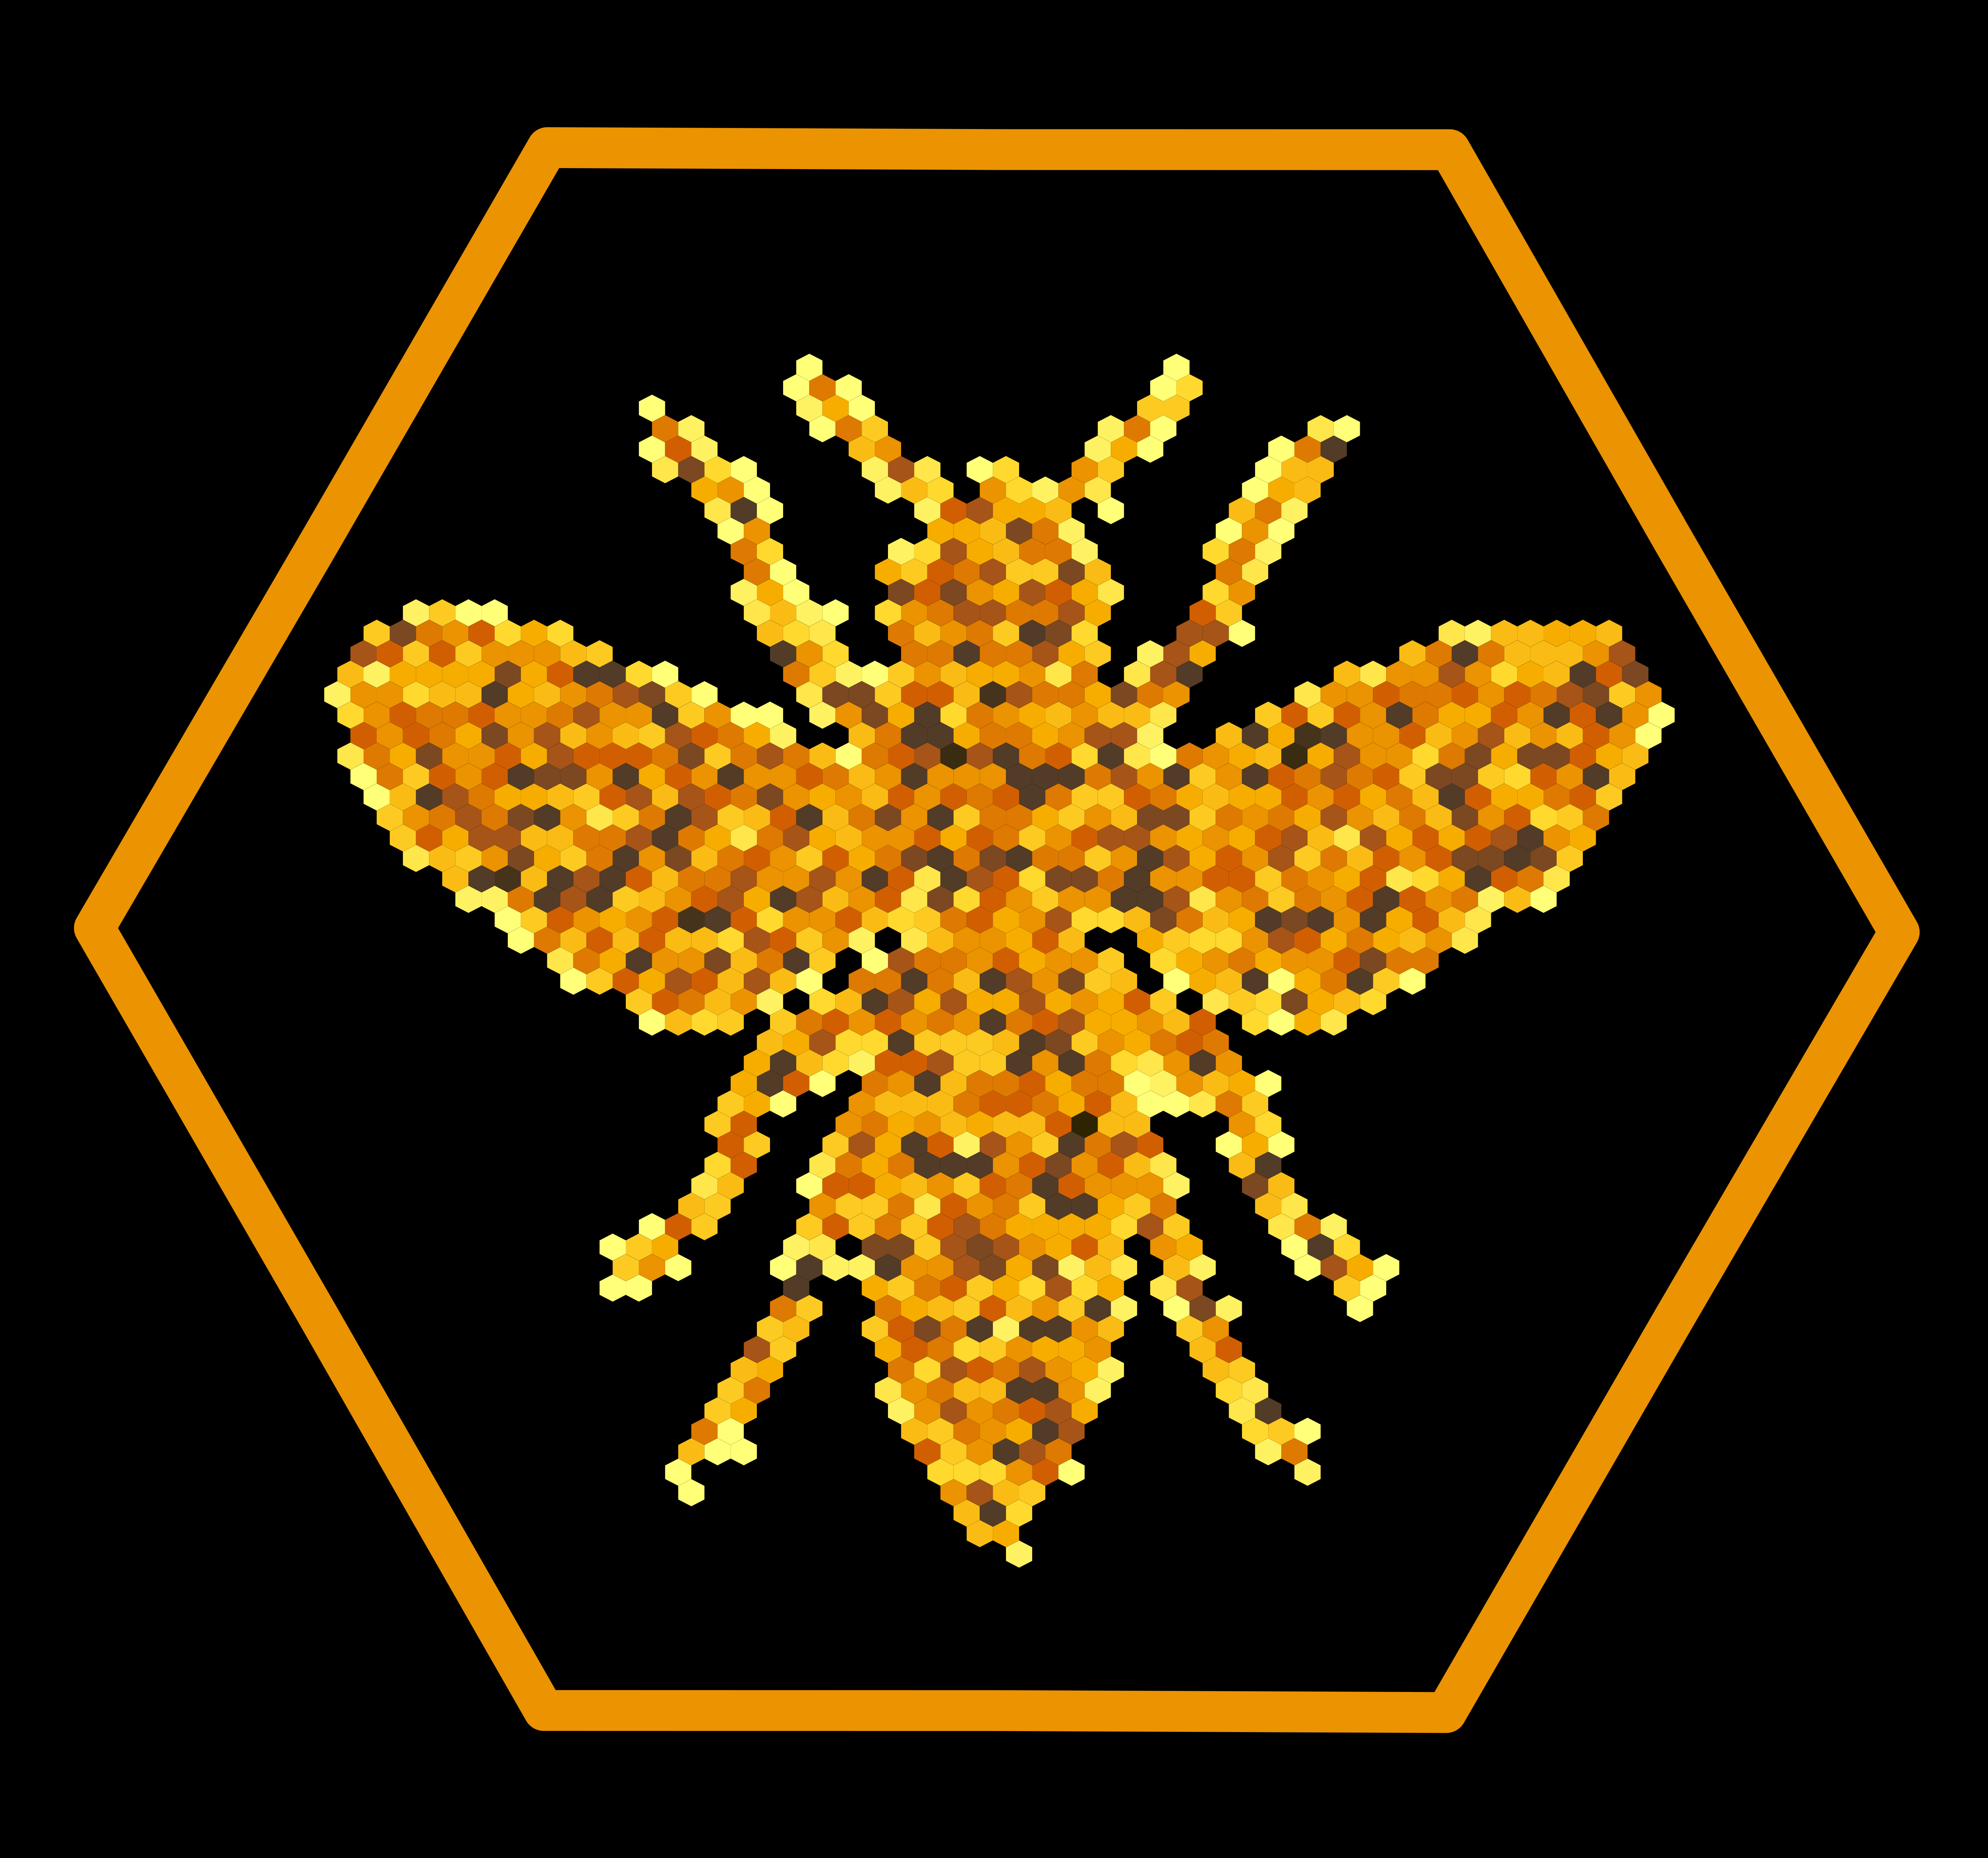
Hexagon tessellation
Since I’m working in R, I knew I had to pay homage to the hexagon. So, for my final tessellation, I created a simple hexagon tessellation using ggplot’s hexbin function. All I did for this was sample points from a silhouette using the pixel intensity as weight (same technique mentioned above) then used geom_hex() in ggplot. By messing with the number of points, number of bins, and colors you can get a pretty nice image. This tessellation is less tweakable than the others, since I don’t have the raw coordinates of the polygons. I could get these coordinates using the hexbin package, and I started down that rabbit hole but then ran out of time ¯\(ツ)/¯
Animation
gganimate is my favorite thing to happen to R this year, so I knew from the start that I would be animating my tessellated menagerie. In fact, in the middle of this project, I decided to spend one of my Sundays making an animated logo for rstudio::conf 2019 using my tessellations and gganimate.
I think it turned out decent, but there is still some weirdness with how the colors change and how the polygons arrange themselves. At this point, I was still trying to fully grok grouping, object permanence, and how it all fits together in gganimate.
I’ve had a little more practice with gganimate now, so as a grand finale for this project I decided to make an animation of various tessellated animals. I wanted a cohesive style and color palette, so since this thing all ended up being about sort of simplifying images, silhouettes, minimalism, etc. I decided to go with a primary color palette and style inspired by Piet Mondrian. The idea was to have each animal look like it was shattering and the pieces would fall into place to make up the next animal (please no one tell PETA that I’m trying to shatter animals).

I think it turned out really neat! I wanted a staggering effect with the transitions, which Thomas said he was working on, but it’s not available yet. The numbers of polygons is different between the various states, which is why the stag and bear have polygons that are left up top when they shatter. I could add dummy points (which is what I did with the rstudioconf logo) to make all the polygon numbers equal, but I kind of liked the way it looked without them. There also might be some fanciness I could add with enter/exit functions, but I was tired by this point and already satisfied with the result.
How can I make these?
I am glad you asked! All of the inputs, outputs, and code I used in this project can be found on my 12 Months of aRt GitHub repository. In this repository there’s a folder for January, where you will find a readme that takes you through the basics of how to make these. The code is commented, but not perfectly, so please reach out on Twitter if you have questions—I’m more than happy to help. If you want to expand on this project or reuse my code I encourage it! However, I do ask that you be polite and credit me with an acknowledgement.
I had so much fun doing this project, I hope you all enjoyed the result, and if you’ve made it this far, I salute you. Stay tuned for February when I’ll have an entirely different project to share!